I was finally able to finish my new portfolio website! It has been 2 years since I last updated my website and I think it’s about time that I make a new one. My last version was not bad, but I think it looks a bit dated. I also have different needs now as compared to before.
In this article, I want to show my step-by-step process in making a website and what it took to create my 2020 portfolio website. Hopefully my simple process can help anyone who is reading this.
01. 2018 Goals vs 2020 Goals
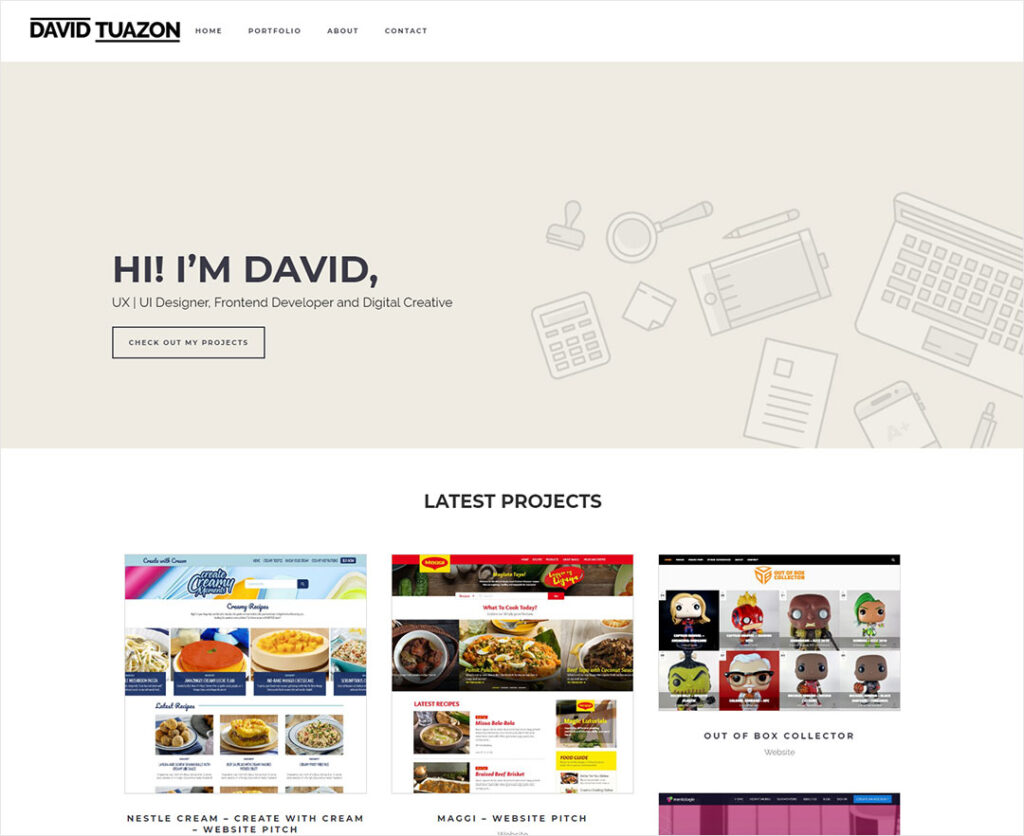
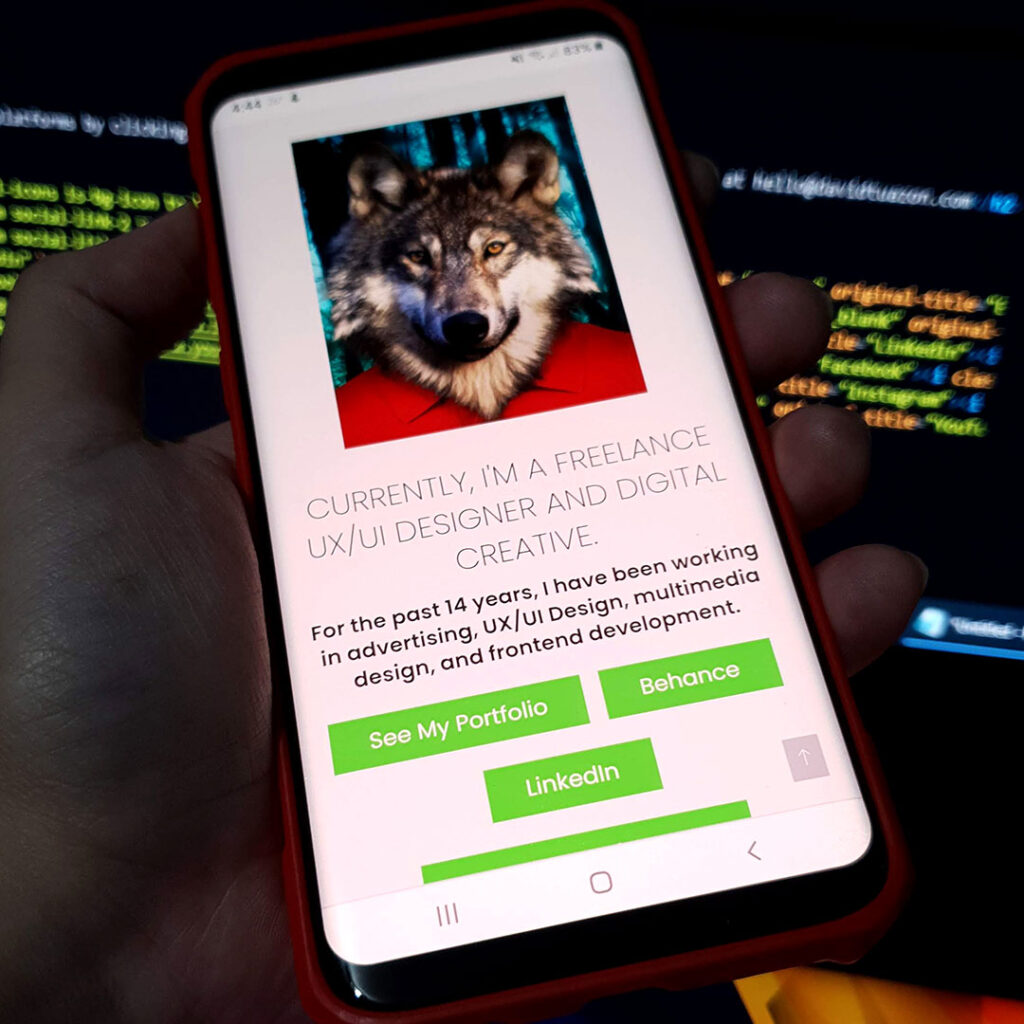
In the 2018 version, my main goal for the website was to showcase my works as quickly as possible. To be honest, I really didn’t know what to do with my site back then. I just wanted to show something to people when the need arises. Here’s a part of the home page:
In the 2020 version, I need some features to help me get clients or a job. Not only do I want to be active in sharing my thought process in different aspects of design, but I also want to share resources to everyone.
The Goal – Quickly Design and Develop the Website
We’ll do this by doing five things:
1. Figure out the best User Experience of the website based on my needs.
2. Design a minimalist and modern looking website. (Mobile and SEO are my top 2 priorities).
3. Develop the website.
4. Testing, Bug fixes, Iterate (if needed).
5. Launch the website.
02. The Website Plan
The main targets of my portfolio website are future clients and recruiters (these include HR, high ranking creatives, and/or business owners). My design blog/resources page target are fellow designers that range from beginners to professionals or anyone who needs help in figuring out things about design.
Pages & Features
- Home Page – Shows an overview of who I am and links to my social media platforms
- Portfolio page – showcases my work in detailed form with quick filter feature
- Add at least 5 of my best work in my portfolio site on launch.
- About – Shows an in-depth profile of me and what I can do
- Design Blog – for writing my stuff
- Article – Post 1 article at launch – (This article that you’re reading right now 😊)
- Resources Page – a part where I can share templates, designs, graphics, my own fonts, photos etc. that you can use for free
- Premium content selling – Next Iteration
- Merch store – No merch yet, but I’m planning to have these in the future
- Contact – Quick way of contacting me
- Contact form
- Links to Social Media Platform
- Maybe, just maybe, FB messenger integration. I’m still thinking about it.
- Google Analytics – this is essential in seeing if my new design or my new website is working
- SEO – SEO integration plugin
- Mobile First Responsive
- Video embedding feature from third party sites (YouTube, Vimeo etc.)
- Image embedding feature from third party sites (IG, Pinterest etc.)
- Search – search feature for the entire site
- Newsletter – (optional) I’ll be implementing this next time. This, however, is not a priority.
03. Let’s get to work!
It’s time to get to work and make this happen! I gave myself 4 days to finish the website. I started Tuesday November 3, 2020 and I was able to launch by November 7, 2020.
Timeline – 4 Days
Day 1
- Server Setup
- Testing Server
- Prod Server
- Localhost Server
- Git Repo Setup
- Wireframes
- Main Website Design
- Content Creation
- Copy Writing
- Portfolio Design
Day 2
- Coding (Local Only)
- Deploy to Testing Server EOD
Day 3
- Testing of features
- Screen Size Testing
- Bug fixing
- Content Propagation
Day 4
- Deploy to Testing
- Deploy to Production
- 301 Redirects
- Final Testing
- Deploy to Live
Launch EOD or next day 😊
Day 5
- Launch 😊
- Share to social media platforms
04. Create
Wireframes
I used Adobe XD to make my wireframes. I already knew what to do but I still needed a quick wireframe guide, so as not to forget the things that I have to do. It’s a straightforward and minimal design. I wanted the focus of the site to be the content. I could have done a lot of effects for this portfolio website, but I chose not to do fancy stuff. My design is neutral because I have worked on a wide range of brands before. I also want each of my work to be the focus on their respective pages. I was very lazy in doing the presentation of my works in my previous site, so I needed to re-do all of them. I just started with 5-8 of my best/favorite works since it’s a time-consuming process.
Based on the analytics of my website from October 2019 – October 2020, the users clicked my portfolio page first before any other page. So, after a quick introduction about me, I had to put my portfolio ‘push’ on the top part of the home page.
Here’s a quick look at my wireframes:
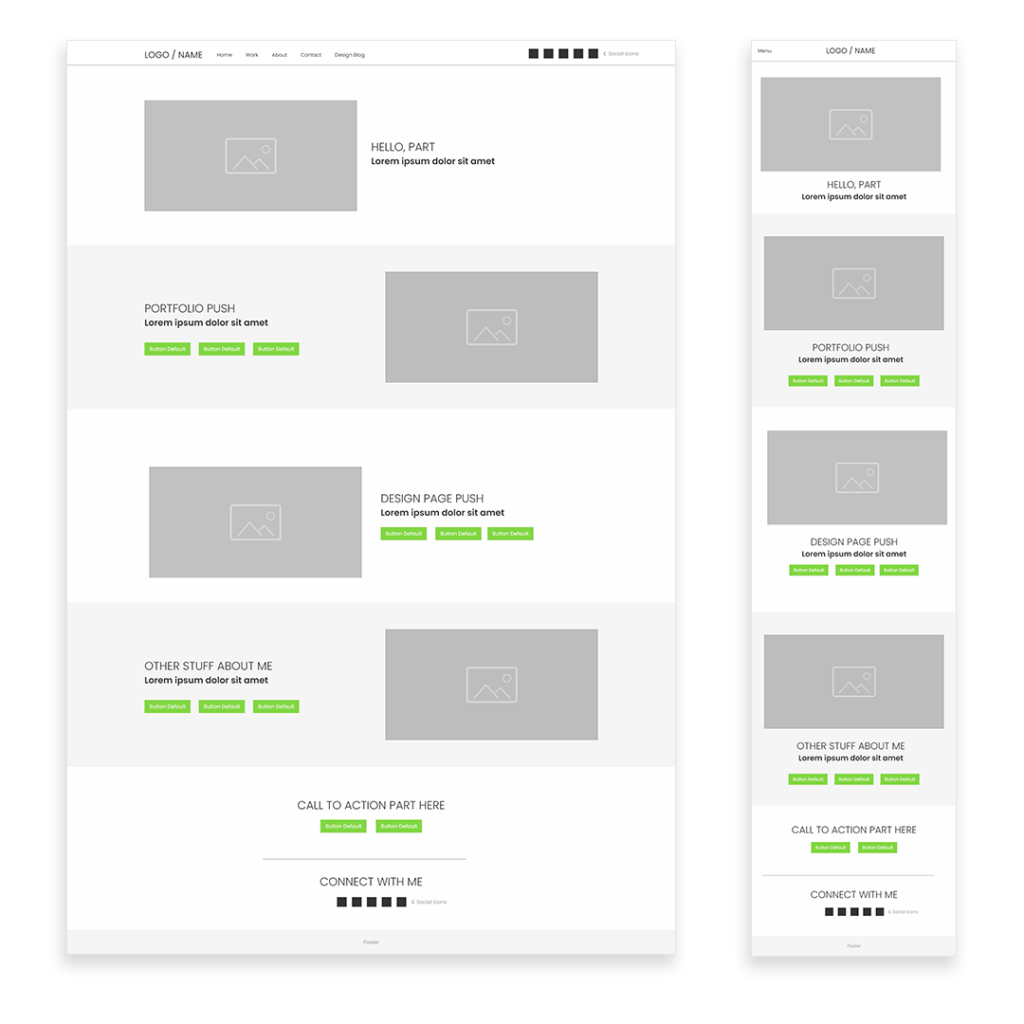
My wireframes are free to use. It has all the pages of my website. You can download it here.
Stylescape
I skipped the Stylescape part of my design process (I usually do this for my clients) since I already know what I want. I just designed the site in my head while coding to save time.
It took me 2 days to finish my design.
05. Deploy
I used WordPress as the main CMS platform and made a custom theme. I was choosing between the WordPress twentytwenty theme and Pixwell Premium theme as a base theme. However, since both of them doesn’t have the design that I had in mind, I just made a custom child theme based on Pixwell since it had more features.
Just a side note… I wanted to use Webflow for my new website, but, I figured, I can code and deploy faster, if I do it in WordPress. I’ll also have full control of my website when I do it in WordPress. Plus, I’ll save money.
Coding Process
- I designed and coded everything locally and deployed everything in my testing server at the end of each day.
- I tested it on various screen sizes including different phones.
- I iterated as needed and fixed the bugs until day 3.
06. Enjoy
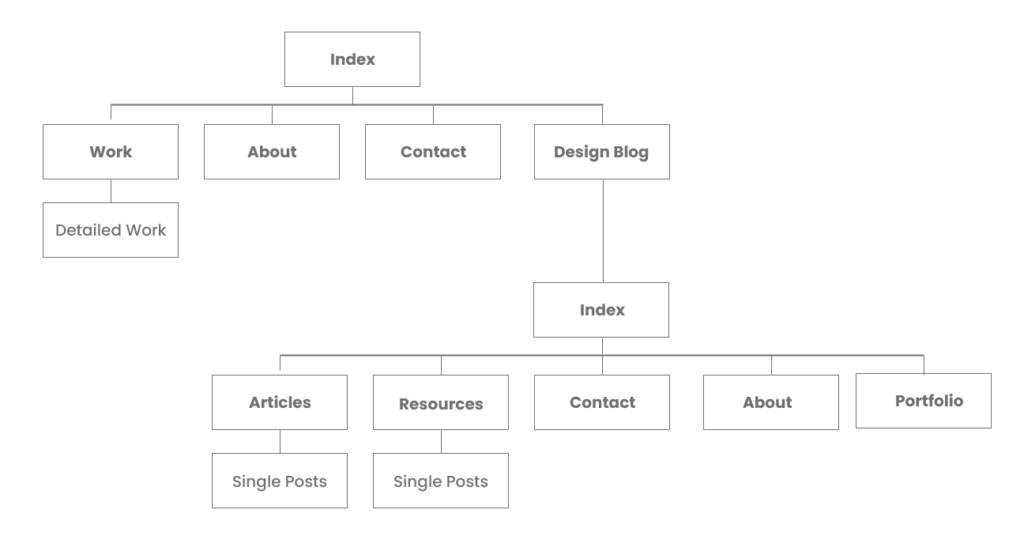
I finally have a fully working website! I relaxed on Day 3 for a bit since I’m very happy with everything that I did so far. My website, or should I say, websites, are fully working! Technically, I made 2. I decided to put my design blog on a separate sub-domain, so my portfolio and design blog can be managed independently. I can also make different designs for the two websites if I want to. So, there two separate databases and two separate design themes. I think it was worth the extra step.
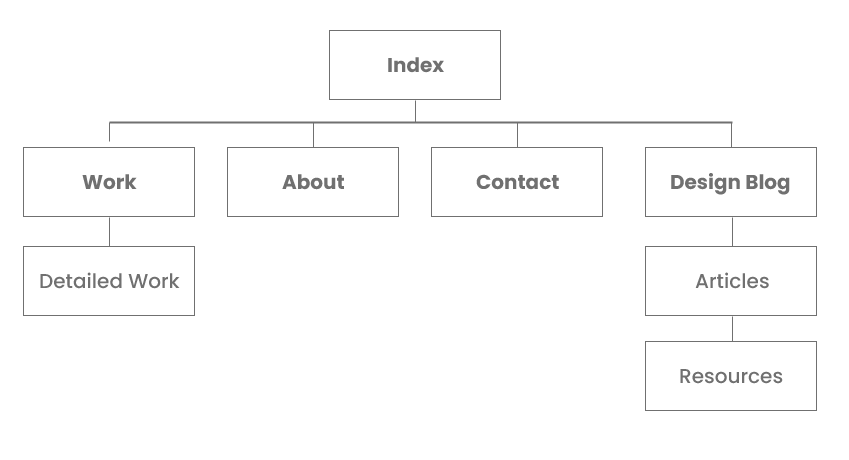
Here’s the updated sitemap:
I did most of the propagation of the pages on the third day. It was only Day 3 and I was already ahead of schedule! I just decided to sit back, relax, and enjoy my new creation. I could have launched it on Day 4, but I just decided to launch it on Day 5 (Saturday) instead. I just needed to mirror the Production server to Live and it was good to go.😊
Here are the links to my websites:
Portfolio Website 2020 – davidtuazon.com
Design Blog – design.davidtuazon.com
My wireframes are free to use. It has all the pages of my website. You can download it here.
And there you have it! My new portfolio website for 2020! It’s simple and I can’t wait to see its effectivity. It will take some time for the SEO to work so I’ll just be writing more articles in the coming days.
Thank you very much for reading my first article.
– David